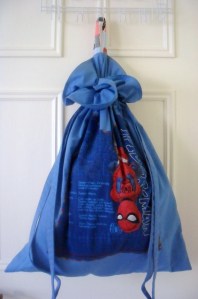
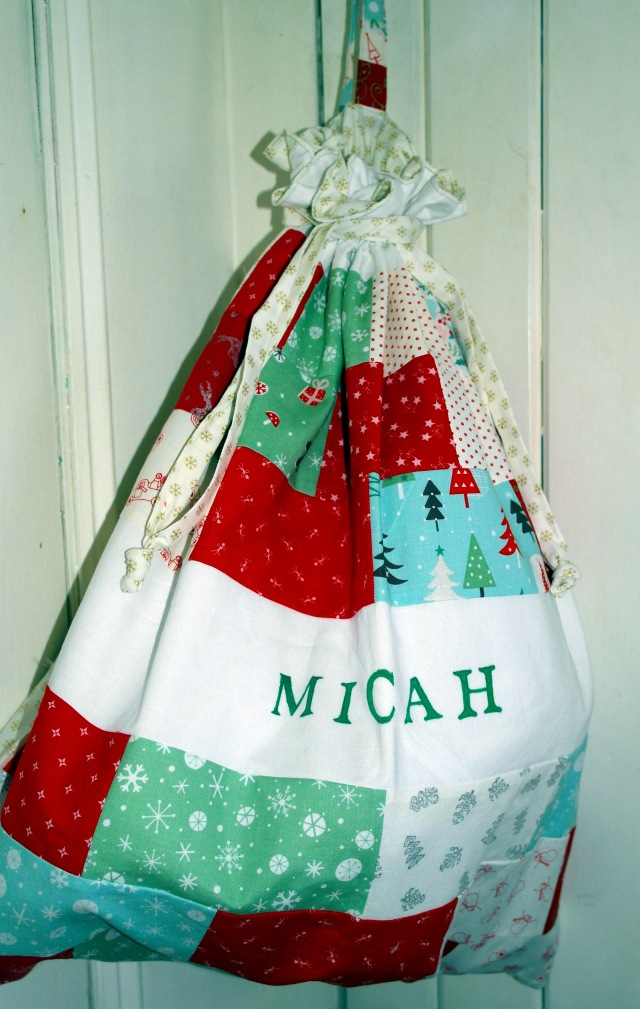
This week I have been working on writing a tutorial for how to make a santa sack. I have had so many lovely messages about the santa sack I finished last week (view that post here), from people who are new to sewing, I decided to share how I made mine. 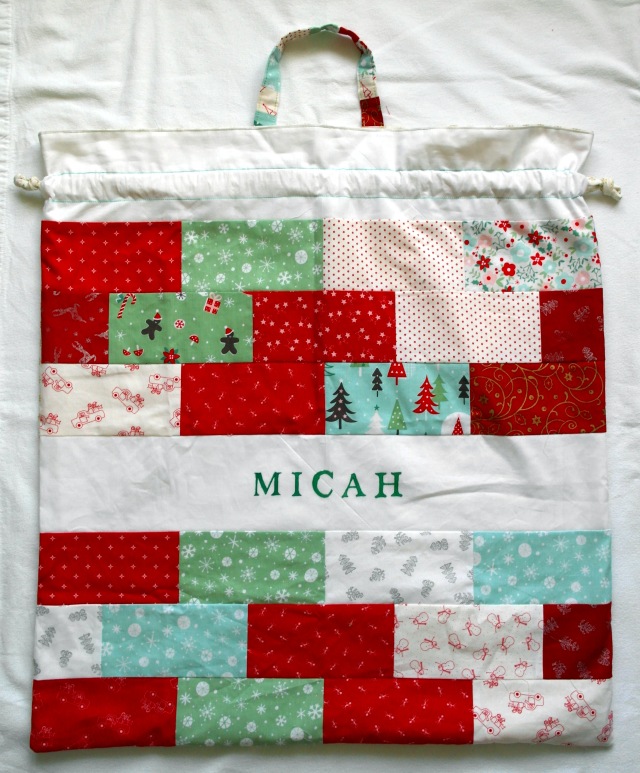 The santa sack for this tutorial has a simplified version of the patchwork, I did on the other sack. There are no seams to match up, so it is not too scary for anyone new to patchwork. The construction on a drawstring bag is also pretty straightforward for beginner sewers. Of course if you choose different fabrics for this tutorial you can make a large toy bag instead.
I would really love to see your finished santa sacks, you can email them to me at the address on my about page and I will feature my favourites. If you are a beginner (or like me you find patterns seem to be written in a foreign language) and you get a bit stuck, please drop me a line and I will do my best to help you out. How to make a personalised Santa sack
The finished sack measures approximately 23 ¼ ̎ X 25 ½ ̎ (59 cm X 65 cm). All seams are ¼ inch unless otherwise stated. If you are a beginner you can use a ½ seam to make the sewing a little easier.
YOU WILL NEED
Minimum of 3 fat quarters of different Christmas themed fabrics for the patchwork panels and grab handle.
1 meter ( 1 ¼ yards) fabric for exterior back, lining panels and drawstrings.
1.5 meters (1 ¾ yards) of calico (American muslin) for lining.
Matching thread
Topstitch thread (this will be seen)
Sewing machine
Rotary cutter, cutting mat and ruler
Tape measure
Permanent fabric markers (I used Stained by Sharpie)
Removable fabric pen/ pencil Scissors
MAKING THE PATCHWORK PANELS
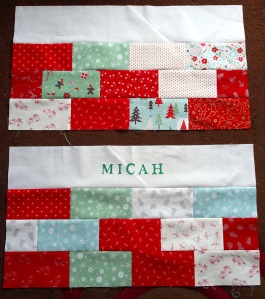
You will need the fat quarters or whatever fabrics you have decided to use for the patchwork. I have a great collection of Christmas themed fat quarter sets which coordinate with each other beautifully. But if you don’t want to buy a full set of eight, you can get a pretty patchwork using at least three different fat quarters. We are going to be making two patchwork panels. If you don’t want to make the patchwork panels you could cut two fabric panels 62.2 cm x 24.1 cm (24 ½ ̎ x 9 ½ ̎ ) instead.
- Cut the fat quarters in to 8.9 cm (3 ½ ̎ ) strips. Then cut each strip in to rectangles (8.9 cm x 16.5 cm (3 ½ ̎ x 6 ½ ̎). You need 26 rectangles.
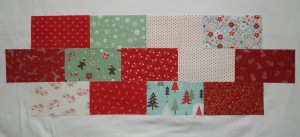
- Take five random rectangles and sew together on the short end so you have one row. Now repeat this with another five rectangles. You now have two rows of five rectangles.
- From the remaining rectangles sew these together on the short end to make a row of four rectangles. You should have four rows of four rectangles and two rows of five rectangles.
- Take two rows of four rectangles and one row of five rectangles. Press seams in each row to the side.
- Lay the three rows out together with the row of five rectangles in between the two shorter rows. Stagger the middle row, so you get a brick effect, I did this by eye.
- Now turn the top row on to the middle row so right sides are together. Pin together and stitch.
- Trim the excess fabric. Turn the bottom row on to the middle row right sides together (check the brick pattern to make sure you have the right rows) pin together and stitch.
- Press seams to one side.
- Repeat steps 4 to 9. You now have two patchwork panels.
MAKE THE NAME PANEL AND TOP PANEL
- Take the white fabric and cut two 11.4 cm (4 ½ ̎ ) strips, from the width of the fabric. My fabric is 112cm (44 inches) wide, if you have an extra wide fabric you may only need 1 strip.
- Cut each strip to 62.2 cm x 11.4 cm (24 ½ ̎ x 4 ½ ̎). (I have a seam in my panel because I used some off cuts, you will not have a seam).
- Take one of the strips fold in half, putting short ends together. Press fold to make a sharp crease.
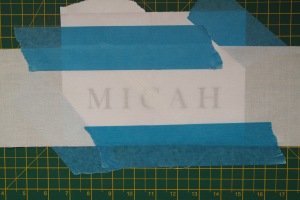
- Using a wordprocessor program to type your chosen name. Use a font that will be easy to trace, make it large enough to fit on one line of A4 in portrait. Print using high quality.
- Fold the A4 sheet with the printed name in half lengthwise and make a sharp crease down the fold. Tape the print out on to a flat surface. Take the white fabric strip with the crease and place it over the top of the print out matching the crease lines, the name should be in the centre of the fabric. Tape the fabric down.
- Trace the name on to the fabric using permanent fabric markers or fabric paint. Set according to manufacturers instructions.
MAKE FRONT EXTERIOR
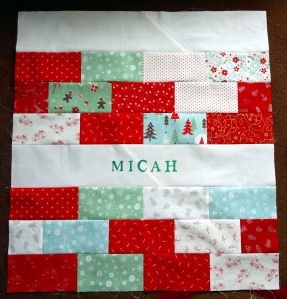
- Take the name panel and one of the patchwork panels. Put right sides together pin and stitch. Press seams toward the patchwork panel.
- Repeat with the white panel and the other patchwork panel.
- Take the panel with the name and pin right sides together to other patchwork panel. Stitch together. You now have the front exterior.
- Take the front exterior. From the top measure down 5.1cm (2 inches) on the side seam edge and mark. Then from the top measure 8.3cm (3 ¼ ̎) down on the same edge and mark. This is the gap for the drawstrings.
MAKE BACK EXTERIOR AND DRAWSTRINGS
- From the exterior back fabric cut a piece 62.2 cm x 66.7 cm (24 ½ ̎ x 26 ¼ ̎). Set this piece aside.
- From the remaining exterior back fabric, cut across the width (selvedge to selvedge), three strips of 2 inches. Take one of the strips and cut in half. You now have to long strips and two short strips.
- Take one long strip and one short strip and join together. Repeat this with the remaining strips. You now have two long drawstrings. Cut each drawstring to at least 51 inches.
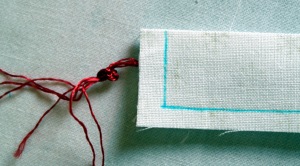
- Take one drawstring and fold in half lengthwise with right sides together and press. Take a thin cord or some ribbon (I used an embroidery floss with a knot in the end), place inside the drawstring along the fold. Sew the short end to secure the cord. Sew the long edge, take care not to get the cord caught, backstitch at the end.
- Pulling firmly on the cord slide the tube down, turning it right side out. It may help to start by poking the end in first. When the drawstring is the right side out, cut the cord close to the edge, take care not to cut the fabric.
- Tuck the open end in and stitch closed, either by hand or machine. Press drawstring.
- Repeat steps 4 to 6 with the other drawstring.
MAKE SANTA SACK EXTERIOR
- Take front exterior and back exterior. Pin right sides together. Place a pin on the marks you made for the drawstrings, so you know where they are and when to stop sewing.
- Stitch from the top of the bag down to the first pin and stop, remember to backstitch here. Do not stitch between the two pins. Now move to the next pin, start with a back stitch and sew down the side of the santa sack. Remove the pins. Repeat on the other side.
- Stitch across the bottom edge of the sack. Remember to backstitch.
MAKE SANTA SACK LINING
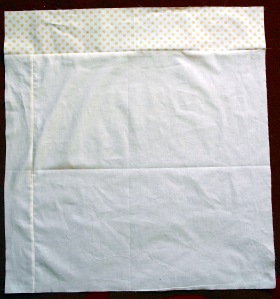
- From calico fabric cut two pieces 62.2 cm x 56.5 cm (24 ½ ̎ x 22 ¼ ̎). From the exterior back fabric cut two pieces 62.2 cm x 11.4 cm (24 ½ ̎ x 4 ½ ̎).
- Take one piece of calico and one piece of exterior back fabric, pin right sides together and stitch. Repeat with the remaining pieces. You now have two lining panels.
- Pin the two lining panels right sides together. Stitch down both sides. Stitch across the bottom edge leaving a 7.6cm (3 inch) gap. Remember to back stitch at start and finish. You now have the santa sack lining.
MAKE THE GRAB HANDLE.
- Using your scraps of fabric from the patchwork panel, stitch the scraps together until you get a strip which measures 8.9 cm x 25.4 cm (3 ½ ̎ x 10″. Trim the fabric to size if it is larger. Press seams open.
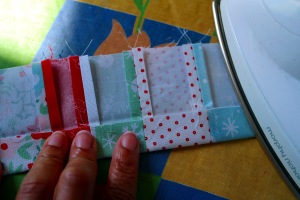
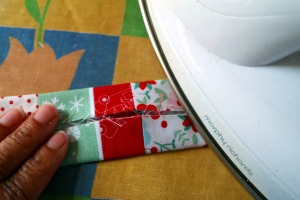
- Fold the grab handle in half lengthwise wrong sides together. Press the fold to make a firm crease.
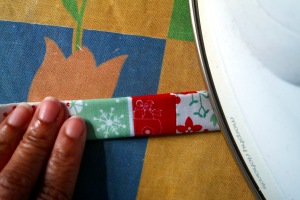
- Open out grab handle. Fold one edge so it is on the crease line. Fold the other edge on to the crease line. (Both edges should be meeting at the centre crease line. Press. Now fold in half lengthwise and press well.
- Topstitch down both long sides close to the edge.
SEW SANTA SACK EXTERIOR TO LINING.
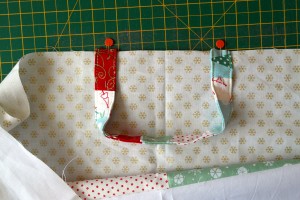
- Take the exterior sack. Find the centre by measuring along the top edge 31.1 cm (12 ¼ ̎), mark with a pin. Take the grab handle. Pin the ends to the right side of the exterior back fabric across the centre, you can measure the distance, or do it by eye.
- Make sure the exterior sack is inside out. Turn the lining right side out. Place the lining inside the exterior so right sides are together. Match seams and pin around the top of the sack.
- Using a ½ inch seam allowance sew around the top edge. Backstitch over the grab handles to reinforce. Remember to backstitch at the start and finish.
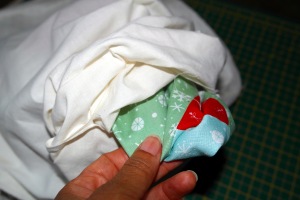
- Now turn the bag right side out by pulling it through the whole in the lining. Press the seams in the lining hole and machine stitch the opening closed, backstitch at start and finish. Push the lining down inside of the sack.
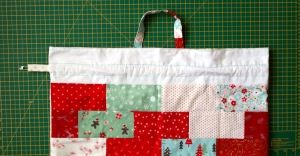
- Press around the top edge of the santa sack. Using the free arm on your sewing machine top stitch around the top edge of the sack.
SEW DRAWSTRING CHANNELS
- Measure 4.4 cm (1 ¾ ̎) down from the top and mark a line going all the way around the top of the bag front and back. Now mark a second line in the same way 5.1 cm (2 ̎ ) down from the top edge. These lines should match up with the gaps in the side seams.
- Stitch along the marked lines, all the way around the bag. Use a walking foot if you have one. If you get any little puckers don’t worry, they will be hidden when the bag is finished.
FINISHING THE SANTA SACK
- Take one of the drawstrings and attach a large safety pin to one end. Feed the drawstring through the bag channels coming out the same side you went in. Repeat with the other drawstring, this time going in from the opposite side.
- Tie the drawstrings together with a knot.
- Wash off any markings. Press the sack. Clip stray threads.
Congratulations you have finished your personalised santa sack. Remember to send email me a picture of your finished Santa Sack.
I will be linking up with Needle and thread Thursday. TGIFF. Crazy Mom Quilts. Diana Rambles. Life As We Know It By Paula. Fabric Frenzy Friday. Weekly wrap up. The Party Bunch. Can I get a whoop whoop Bacon time with the hungry hypo . Clever Chicks Blog Hop




While I don’t want to think about Christmas at all, this is adorable and can be used for any occasion!
LikeLike
I love Christmas…I think it about all year round!
LikeLike
Thanks for sharing your tutorial. I may be using it soon. I found you on TGIFF link up. Stop by and check out my blog sometime.
LikeLike
Thank you Zenia
LikeLike
This is an awesome tutorial. Thank you.
LikeLike
Thank you very much. I thought it would make a nice introduction to patchwork for people who are beginning their sewing journey.
LikeLike
So cute! I love it! I especially love that the name you used is the name of my youngest! Thanks for the tutorial too!
LikeLike
Thank you. It is actually my son’s name, when he saw the other Santa sack I made, he begged me to make him one. He hasn’t seen it yet, I am keeping it as a Christmas surprise for him.
LikeLike
Love this cute sack! My Micah is 32 yrs old! Should I make him one? LOL.
I’ll find some little cutie to surprise. Thank you.
LikeLike
Thank you for your kind words. I say make him one, I refuse to accept that my son will ever grow up, and I think you should do the same!
LikeLike
Pingback: Around The World Blog Hop | The Quilting Bird